Pancakes are an American classic, and in my house, we always made buttermilk pancakes. Thicker than normal pancakes, with a slight tangy flavor from the buttermilk, these pancakes are, in my opinion, far superior to the standard kind. In fact, they recently made me a new friend - after I made the pancakes for an Easter brunch, one of the girls there fell in love with them, and every time I saw her after that, she begged me to make them again! The recipe is ridiculously simple, so I think it's worth giving them an entry here.
Ingredients:
1.5 cups sifted, all-purpose flour
2.5 teaspoons baking powder*
0.75 teaspoons salt
1 large egg
1.25 cups buttermilk
3 tablespoons melted butter
* The original recipe says to use 0.5 teaspoons baking soda instead of the baking powder when buttermilk is used in place of regular milk, but I used baking powder, and the pancakes came out just fine.
Sift the flour, baking powder, and salt together in a big bowl. Mix the egg, buttermilk, and butter together separately. Then pour the wet mixture into the dry mixture. Stir until the dry mixture is completely covered (i.e., you can't see any more flour), but do NOT stir until smooth. The batter should be somewhat lumpy.
At this point, you can cover the mixture and refrigerate it until you need it, or you can make the pancakes immediately.
When I make the pancakes, I always make them in two pans at once, so they're done faster. Have on hand a big plate to put the pancakes on and a clean towel to cover them, so you can keep them warm while you're cooking the rest. You'll also need a good spatula and a ladle or large spoon for the batter.
If you have cast-iron griddles, those are definitely the best pans to use, but if you don't have any, just use the sturdiest pans you can fine. Heat the two pans on two burners. To test if the pans are hot enough, sprinkle a little water on them - the water droplets should skip across the surface of the pan when it's ready.
When the pans are hot, spoon batter into the center of each pan in a small circle. If necessary, use the spatula to flatten the pancakes out a bit, as the buttermilk makes them quite thick. When bubbles appear on the tops of the pancakes, they are about ready to be flipped. Check by lifting the edges of the pancake with the spatula (it's also good to do this periodically anyway to keep the pancakes from sticking to the pan).
When the bottom of the pancake is golden brown, flip it with the spatula and cook until the other side is also golden brown. Then flip the pancake onto the plate, cover it with a towel, and pour more batter into the pan.
You may need to adjust the heat of the burners as you go. If the pancakes are getting dark too quickly, turn it down, and if they're taking too long to cook, turn it up.
When all the batter has been used up, serve the pancakes warm. The classic way to eat them is with maple syrup, which I love, but I also like to eat them with butter and jam. Feel free to add whatever toppings you like - sour cream, fruit, etc.
Thursday, June 30, 2011
Wednesday, July 7, 2010
Croque-monsieur
A croque-monsieur is a French grilled cheese sandwich and, like anything whose main ingredients are bread and cheese, it's really incredibly delicious.
Though I lived in Paris for three months, in the south of France for another five weeks, and have visited France numerous times, I somehow managed to get through all those visits without ever eating a croque-monsieur. On my last trip to Paris, en route from Malta to San Francisco, I decided I really should try one, as they're such an essential part of French culture, and I was blown away!
Though I kept telling myself it was just a glorified grilled cheese sandwich, the croque-monsieur I had at a beautiful café in the sixth arrondissement was far better than any grilled cheese sandwich I'd ever eaten. What made it so good? Well the location certainly helped, but I would also say the excellent quality bread and cheese, the addition of ham, and of course, a generous portion of butter!
As soon as I came back to California I made my own, and I plan to make many many more in the future!!
Ingredients:
1 or 2 medium-thin slices of bread*
High-quality french cheese**
Ham
Butter
Salt
Pepper
* Though many recipes call for pain de mie, which is basically French sandwich bread (soft & white), the croque-monsieur I had in Paris was on a more crusty rye bread, and I really liked it that way.
** Emmenthal is the most common cheese used, and that's what I used, but a similar cheese like Gruyère would also work.
If you have a toaster oven, that's perfect for the croque-monsieur. If not, a regular oven or a pan on the stovetop will also work. Assuming you're using a toaster-oven, preheat it to around 350º F/180º C and prepare the croque-monsieur while it's heating:
Butter the bread thoroughly and place the ham in an even layer on top of the bread. Sprinkle with salt and pepper and then spread the cheese in an even layer on top of the bread. Though most versions of the croque-monsieur have you add another slice of bread on top (decked with béchamel for a fancy version or with an egg to make a croque-madame), my Parisian croque-monsieur was served open-faced, and I enjoyed it very much that way. Either way, place the croque-monsieur in the heated oven and let cook about 10 minutes until the cheese is melted and the bread is toasted.
Serve warm with some fresh, lightly dressed salad.
Labels:
croque-monsieur,
emmenthal
Wednesday, April 7, 2010
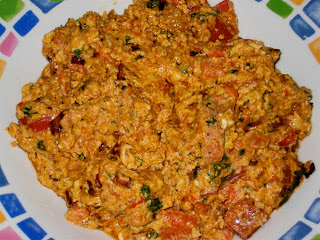
Menemen - Turkish scrambled eggs
I cannot think of a better way to spend a Sunday morning than eating these delicious Turkish-style scrambled eggs while sitting at a café in Istanbul's Bebek quarter and looking out at the ships sailing down the Bosphorus.
But even if you're not in Turkey, menemen is a great way to start your day - or end it!! Though it's traditional to have menemen for breakfast, I think it works wonderfully for lunch or dinner as well. It's very simple, and you can add whatever vegetables you want, though tomatoes and peppers are the traditional ones. I made mine with feta and some extra spices like oregano and sumac, but again, this dish is very flexible, so make it in the way that will best please you!
Ingredients (for one generous portion or as part of a bigger meal shared with 3 or 4 people):
2 eggs
1 red pepper
1 large tomato
1 onion
A handful of fresh parsley
75-100 g. feta or other soft white cheese
Salt
Pepper
Oregano
Chile flakes or ground cayenne pepper
Sumac
Olive oil
Wash and chop the pepper, tomato, and parsley, and dice the onion. Beat the eggs well and set aside. In a large pan, heat the olive oil and when it's odd, add the onion. Let the onion cook until soft, and then add the pepper. Let cook about 5 minutes and then add the tomato too.
Cook the vegetables several minutes more, gently crushing the tomato with a wooden spoon to make it more sauce-like. Then add the eggs, and let cook a few minutes more while stirring constantly. Turn the heat to low, and add the cheese then the parsley and all the spices. Cook a few minutes more, stirring continuously, and serve hot with bread. Though it's traditional to eat menemen with pide, a soft Turkish bread, any type will do (but pide is really good, so if you can get some, then definitely use it!)
Monday, March 15, 2010
Melanzane al funghetto
This is an eggplant dish from the town of Bari, in Southern Italy. I was introduced to it when a friend of mine from Bari brought it to a dinner party, and in fact it's a great dish to bring to a party because it's extremely easy to make, and it is best if you let it sit for several hours before serving it, so you can prepare it in advance - even a day before you plan to eat it. And of course, it tastes wonderful!
Ingredients:
1 large eggplant
2 or 3 ripe tomatoes
Large green olives
Capers
A clove of garlic
Fresh basil
Fresh parsley
Oregano
Salt
Pepper
Olive oil
Wash the eggplant, and peel the skin in strips so that some is left on. Cut the eggplant into disks a few centimeters thick, and then cut those discs into squares. Crush the garlic and then chop it up. In a large pan, heat some olive oil and then add the garlic. After 15-20 seconds, add the eggplant, stirring quite often. If necessary, add a bit more olive oil, but don't add too much or else the eggplant will get too soft.
Wash the tomatoes and cut them into cubes, then add them to the eggplants (which should have cooked on their own for about 5 minutes). Then wash the olives and capers and add them in as well. Wash the basil and parsley and chop them finely. Add the basil, parsley, and oregano, and sprinkle everything with salt and pepper. After a few minutes, turn the heat down to low, and let everything cook another 15 or 20 minutes, stirring every so often, until the eggplants are soft but not mushy.
Let cool, and serve at room temperature, or else refrigerate and serve after several hours.
Labels:
eggplant
Wednesday, March 3, 2010
Banana nut bread
I know I haven't updated this blog in forever - not because I haven't been cooking and eating lots of delicious things, but just because I've been so busy with other stuff like studying, dancing, and traveling! However, the second I bit into this bread/cake I knew I had to post the recipe, if only so that I can remember it to make it again!
And again and again and again...
For some reason, I've suddenly started making all sorts of American dishes that I've never made even once in my life before. I suppose it all started a couple weeks ago when an Italian friend asked me for a recipe for chocolate chip cookies (which I have made, plenty of times) and followed up with a request for a recipe for brownies (which I never have made, not even once). I immediately emailed my mom for both recipes and, as I was translating them into Italian, I thought "hmmm, these sound really good..." and a few days later, there I was, scouting out my local grocery store for baking chocolate, butter, and vanilla extract!
The banana bread was even less planned than the brownies, but several days ago my housemate bequeathed a couple of medium-ripe bananas on me, and as I already had several bananas of my own, the obvious solution was to wait a few days for these new bananas to get super-ripe and then turn them into delicious banana bread! Having never baked banana bread before, I scouted around for some recipes, and finally settled on a recipe by David Lebovitz, which I then tweaked quite a bit to fit my tastes/available culinary options! The original recipe can be found here. My own version is given below. It's a bit breadier than most (uses whole wheat flour, yogurt, etc.), but it still tastes quite sweet, and the nutmeg really adds a kick.
Ingredients:
2 very ripe bananas
125 g. cake flour
125 g. whole wheat flour
125 g. sugar
A largish spoonful of vanilla sugar
A small spoonful of salt
A small spoonful of baking soda
A spoonful of baking powder
175 g. plain, whole milk yogurt
50 g. unsalted butter + extra for buttering the pan
2 eggs
75 g. walnuts
Half a nutmeg
A spoonful of cinnamon
Leave the eggs out until they are at room temperature. Then preheat the oven to 180º C / 355 º F, and butter a loaf pan.
Melt the 50 g. butter and let cool a bit. Grind the nutmeg, and sift together the two flours, the salt, the baking powder, the baking soda, the nutmeg, and the cinnamon. Stir the sugar and the vanilla sugar into this mixture.
Chop the walnuts into small bits and mash up the bananas until they are very soft. Beat the eggs and combine them with the melted butter, the yogurt and the bananas. Stir the liquid ingredients together thoroughly, and then make a well in the center of the dry ingredients. Add the liquid ingredients to the dry ingredients, stirring until just combined but no longer (until you can no longer see any bits of flour or anything). Stir in the walnuts, and spread the whole mixture into the loaf pan.
Bake for 40-45 minutes until the top is browned and a fork stuck into the middle comes out clean. Let cool and then eat!
Wednesday, October 21, 2009
Make your own muesli
For years and years and years I ate granola with yogurt for breakfast, and it never occurred to me to use anything other than pre-mixed granola. But all that changed about a year and a half ago, and since then I've been waking up nearly every morning and eating this:
What happened a year and a half ago that was so thunderously life-changing? I read Michael Pollan's essay (now a book) in the New York Times - "In Defense of Food: An Eater's Manifesto". That essay completely changed the way I thought about food. Actually, 'changed' may not be the best word here, because I simply hadn't thought about food, at least not in depth, before.
It's shocking - I mean, we eat food every day, it's all around us, and yet in American culture at least, nobody actually wants to think about food. We don't ask ourselves "What is it? Where did it come from? How did it end up in front of me? How many hands have touched this? How many machines have manipulated it?" But once you do start asking those questions, once you look at a package of cookies and no longer see them as "Chips Ahoy!" or "Oreos" or whatever they've been branded as, but as a mixture of flour, sugar, chemically treated oil from something - supposedly vegetables?, additives with names too long to pronounce or understand... once you think about how these things were made (what is a corporate cookie factory like anyway?) and how their production is affecting the economy, the environment, the general health of the population, your own health, etc., etc., welllll, it's enough to put you off processed food permanently! At least, it was enough to put me off processed food in the sense of corporation-generated, has ingredients I would never use even if I had access to them, and really doesn't even taste that great - sort of processed food.
Which brings me back to my muesli. I actually don't think pre-prepared granola is all that bad in the grand scheme of things. It generally doesn't have a lot of weird ingredients, it tastes pretty good, and you never really hear about "Big Granola" ruining the industries of small-time oat farmers.
But still. After I read the article, I decided to really clean up my act, and go completely un-processed wherever possible. To be fair, this wasn't all that difficult for me, since at that time I was living in Milan where I had access to a fantastic open-air market and delicious fresh ingredients year-round. But I did make whatever changes I could. Instead of having crackers as a before-dinner snack when I got hungry, I switched to carrots; when possible I made my own tomato sauce instead of using the bottled kind; and I stopped buying pre-packaged granola and flavored yogurt and started making my own muesli mixes with plain and simple whole-milk yogurt.
The best part about making your own muesli is that you can change it every single day. Buy a bunch of stock items (nuts, seeds, dried & fresh fruits), and then just put in whatever you feel like each morning. After extensive experimentation, I have pretty much settled on a favorite mixture, which I'll give below, but I encourage you to play around with your muesli and see what you like best. Admittedly, it's slightly more time-consuming than just dumping a package of granola into a bowl in the morning, but it's also more fun, and it gives you just a little bit more control.
Ingredients:
About 100 g. of plain yogurt
A generous handful of oats
A small handful of linseeds (also called flaxseeds)
A small handful of sunflower seeds
A few almonds
1 banana
In summer: a handful of fresh blueberries and/or raspberries
In winter: a handful of raisins or dried cherries or dried strawberries
In any season: a couple dried apricots or other dried fruit of your choosing
Slice the banana, wash the berries if applicable, and cut up any dried fruit that's bigger than a button (dried apricots, peaches, apples, kiwis, mangos...). Combine all ingredients together, mix well, and eat!
A few notes:
1. I don't generally put in all the fruits I mentioned here - usually I just pick one or two, but I wanted to mention all my favorites!
2. To make this more like granola, you could toast the oats with some honey, brown sugar, canola oil, etc. beforehand. I actually like them plain, but if you prefer yours a bit sweeter, then you can prepare a big batch of oats like this and then just use those each morning.
Wednesday, October 14, 2009
Casarecce alla maltese
Though I'm just at the start of my Maltese culinary adventures, one thing I have learned about very quickly is the ftira maltija - basically the Maltese sandwich. It's made with ftira, a crusty round bread unique to Malta (as far as I can tell), tomatoes, tuna, olives, and of course capers, which grow wild on the islands. I decided to turn the sandwich into a pasta dish, and the result was quite good, maybe even better than the sandwich!
I used casarecce because I happened to have a bunch on hand, but you could probably substitute almost any type of pasta here. I think both long and short types would work, so spaghetti, farfalle, maccheroni, whatever. The casarecce I used were whole wheat, which I think goes well in this dish, as there are a lot of strong, salty flavors.
Ingredients (per person):
75 g. whole wheat casarecce
1 small yellow onion
1 large clove of garlic
1 small can good-quality tuna
4 large green olives
A handful of fairly fresh capers
Crushed tomatoes/tomato pulp
Extra-virgin olive oil
Oregano
Pepper
First, bring a large pot of water to a boil. While it's heating up, prepare the other ingredients. Peel and chop the onion; crush the garlic, peel it, and then chop it up a bit into even smaller bits; and rinse the olives and capers. Crush the olives with the flat side of a knife to remove the pits and then chop them up. Drain the olive oil from the tuna and break it up a bit with a fork.
When the water is boiling, salt it, and add the casarecce, stirring them every so often to keep them from sticking. After a few minutes, heat the olive oil in a frying pan and when it's hot, add the garlic. After about 15 seconds, add the onion too. Once the onion has turned soft, add the olives, capers, tuna, and tomato pulp, and turn the heat down to low.
When the casarecce are al dente, drain them and add them to the sauce. Sprinkle with oregano and pepper, stir up, and serve warm. Especially serve warm if it's a gray, rainy day like it was here today - in Malta, there don't seem to be gutters, so just a bit of rain makes the streets get crazy flooded!!
Subscribe to:
Posts (Atom)